SPN: 3251 / FMI: 0/0
Cummins fault code 1922 becomes active when the soot load of the Diesel Particulate Filter (DPF) has exceeded the recommended limits. To protect the engine, the ECM activates the power derate.
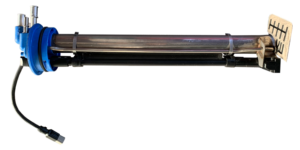
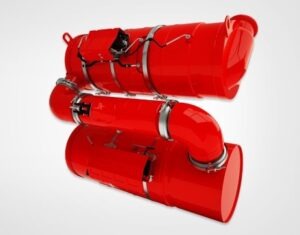
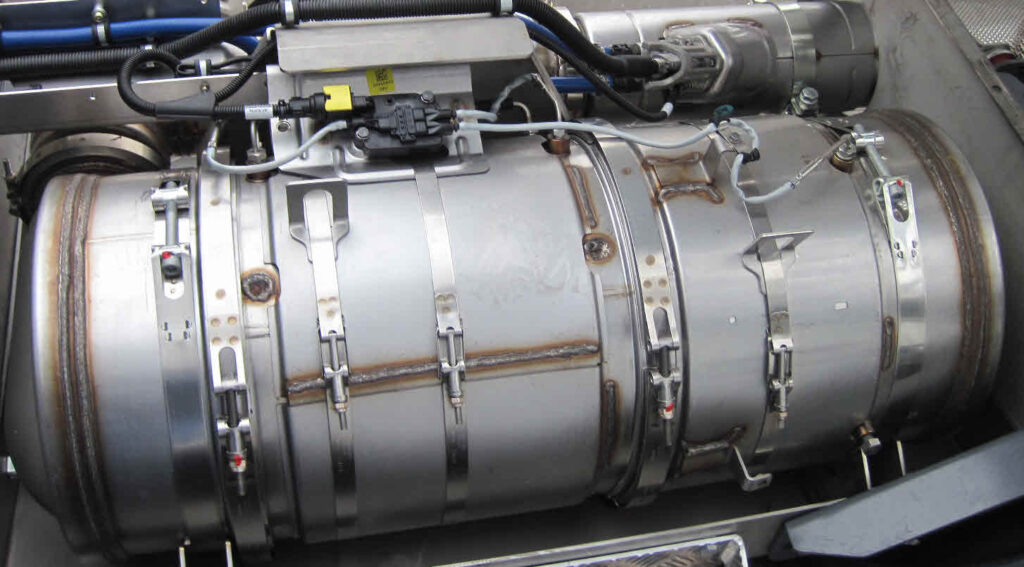
The soot load of the Diesel Particulate Filter is monitored by the DPF differential pressure sensor. The sensor is located on the Aftertreatment system, mounted directly on the DPF. It is not easy to miss – there are two flexible pipes connected on the sensor body. The two pipes allow exhaust gas pressure from the inlet and outlet of the DPF respectively to reach the sensor.
Important to note: The vehicle or machine manufacturer is responsible to construct the wiring harness and allow the sensor to eventually connect to the ECM.
The sensor connector has 4 pins:
+5 Volt supply, ECM Return, DPF outlet pressure signal, DPF differential pressure signal.
DPF Differential pressure sensor circuit function
The ECM constantly monitors the soot load of the DPF. Typically, the engine operating conditions generate high temperatures and allow the passive regeneration of the DPF (self-cleaning). During passive regeneration, soot is burned-off from the inlet of the filter and extend its service life.
Engines that operate longer periods on light loads (eg. idling) might require a stationary regeneration, due to the fact that the average temperatures on the DPF are not enough to allow soot to be burned off passively. If the soot load on the DPF is high, the ECM will activate the DPF system warning lamp on the dashboard.
Soot load is estimated by the ECM, by monitoring the inlet and outlet pressure of the filter. The sensor performs the following simple mathematical function:
DPF Pressure Difference = [DPF inlet pressure] – [DPF Outlet pressure]
Naturally, a small pressure drop is always expected even on new DPFs, due to the fact that the exhaust gases are foreced to flow through the DPF walls.
If the soot load is high, a higher pressure difference is observed, because the accumulated soot will provide a restriction to flow on the DPF inlet side (Inlet pressure > Outlet pressure).
During engine testing, the Cummins engineers have determined the allowed pressure difference levels on the DPF. The ECM activates the fault codes based on the measured pressure difference across the DPF.
What happens when fault code 1922 is active?
The ECM activates the STOP ENGINE lamp immediately after a DPF differential pressure fault is determined to be active.
Depending on the measured soot load, engine torque output will be reduced.
Active and stationary regeneration of the DPF will be disabled.
The operation of the Exhaust Gas Recirculation (EGR) valve will be disabled.
What are the possible causes of Cummins ISX fault code 1922?
Wiring harness: Incorrect wiring harness pin installation. Consult the wiring diagram and check the wires.
Operating conditions: The engine spends too much time on light load conditions, causing insufficient DPF temperatures which prevent passive regeneration to take place.
Engine problems: If the engine has malfunctioned, it is possible that excessive soot is created, causing the DPF to get blocked.
DPF ash loading: Burned soot leaves ash behind. Ash is stored in the DPF. Excessive ash in the DPF, causes blockages.
How to troubleshoot fault code 1922
There are a lot of possible faults that could be triggering fault code 1922. I listed the most important troubleshooting steps below.
You must go through each step until the end to eliminate the possibility that more than one fault codes trigger 1922.
You could also create a free QuickServe Online Account to access all Cummins manuals and wiring diagram for your engine. Check my guide on how to create an account or my training courses on how to use QuickServe Online effectively.
Fault code 1922 possible solutions
Step 1:
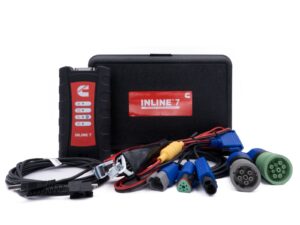
Connect your preferred diagnostic tool, read and list all other active fault codes OR inactive fault codes with more than one counts in the last 25 operating hours.
I would always suggest to use a tool such as Cummins Insite or TEXA (you can even rent one from Diesel Laptops). Check out my diagnostic tool suggestions!
If you have any of the following fault codes active, troubleshoot them first:
Aftertreatment-related faults
Related to aftertreatment regeneration: 2777, 4213, 6416
DPF differential pressure: 1879, 1881, 1883
General DPF faults: 2754, 3133, 3134, 3135, 3316, 3317, 3318, 3319, 3321, 3322, 3396, 5383
Diesel Oxidation Catalyst (DOC) faults: 3313, 3314, 3315
Faults that could be causing excessive soot generation
Fuel System faults: 559, 1139, 1141, 1142, 1143, 1144, 1145, ,4713
Engine misfire: 1654, 1655, 1656, 1657, 1658, 1659
Exhaust Gas Recirculation (EGR): 1228, 1896, 2272, 2349, 2353, 2357, 2961, 2962, 3136, 3137, 3138, 3342, 3382, 3383, 3389
Turbocharger faults: 1898, 2198, 2387, 2449, 2634, 2635, 2636, 3616
Intake manifold pressure faults: 125, 2973, 4616
Intake throttle actuator faults: 175, 176, 177, 3539, 3541, 3542, 5879, 5881, 5882
EGR differential pressure faults: 1866, 2273, 2274
When you troubleshoot any possible active fault codes from the list above, proceed to the next steps below to eliminate all other possibilities.
Step 2:
Check for EGR differential pressure sensor blockage.
Locate the EGR differential pressure sensor (next to the EGR valve), remove the screws and perform a visual check on its pressure ports.
If the sensor ports are clogged, clean them with brake cleaner or equivalent solvent. Proceed to check the condition of the ports on the EGR mass mesurement flow assembly.
Use a wire to see if the ports are free of soot all the way to allow pressure to reach the sensor. If they are blocked or need cleaning, remove the 3 plugs (underneath the mounting position of the sensor) to gain access to the drillings.
Once you are done, connect all components, validate your repair and proceed to the next steps below.
Step 3:
Check the condition of the air filter. If the air filter is restricted, it could affect the air/fuel ratio causing excessive soot generation. Clean or replace as necessary.
Following verification, proceed to the next steps.
Step 4:
Inspect the DPF differential pressure sensor tubes. They should not be damaged or plugged. If they are found to be damaged or plugged, replace or repair as necessary.
Following verification, proceed to the next steps.
Step 5:
DPF differential pressure sensor signal stuck-in-range.
Connect your diagnostic tool and monitor the fault code page. We will create 2 new fault codes related to the DPF differential pressure sensor to check if the ECM detects the new conditions.
Disconnect the DPF pressure sensor connector. Fault codes 1881 and 3134 should become active. If not, check the wiring harness for continuity and correct resistance (less than 10 Ohms). Also check for pin-to-pin short circuits.
Short the +5V SUPPLY pin to the Differential Pressure SIGNAL pin (NOT the outlet pressure signal pin! – check wiring diagram). Fault codes 1879 and 3134 should become active. if not, check the wiring harness for continuity and correct resistance (less than 10 Ohms). Also check for pin-to-pin short circuits.
If any problems are found, check once more that you performed the checks correctly. Replace the sensor.
Verify your repair and continue to the steps below.
Step 6:
DPF differential pressure sensor signal voltage.
If the sensor values on step 5 meet specifications, it is necessary to check the sensor voltage readings further.
Connect your diagnostic tool and monitor the DPF differential pressure sensor voltage (engine NOT running).
Correct readings:
At ambient temperature 25°C (77°F) and below: Voltage reading should be between 0.61 and 0.77 Volts.
At ambient temperature 26°C (78°F) and above: Voltage reading should be between 0.642 and 0.738 Volts.
If your signal values do not meet specifications, check once more to ensure you are doing this correctly. If the signal is indeed out of specifications, replace the sensor.
Verify your repair and continue to the steps below.
Step 7:
Check if the signal of the aftertreatment temperature sensors is within specifications.
Connect your diagnostic tool.
Run the engine on high idle without load (around 1600 rpm) for about 10 minutes to warm up the aftertreatment.
Monitor the temperature readings of the following sensors:
- DOC inlet temperature
- DPF inlet temperature
- DPF outlet temperature
The MAXIMUM difference between the sensor readings should be 24oC (43oF). If the difference exceeds 24oC (43oF), replace the temperature sensor module assembly (the 3 temperature sensors are connected on the same CAN-BUS module and cannot be replaced separately, or be repaired. Replace the whole assembly).
If the measured temperature difference is within specifications, proceed to the next step.
If you replaced the assembly, validate your repair and then proceed to the next step.
Step 8:
If the DPF has already been replaced during the repair (eg. if it was fully clogged), then proceed to step 9.
Otherwise, connect your diagnostic tool and read the fault codes.
Assuming that you validated your repair after each step that you previously followed (run engine, test drive etc):
If fault code 1922 is still active OR inactive with more than one counts in the last 25 operating hours, the DPF is fully clogged. Replace the DPF.
Step 9:
This step will only work if you use Cummins Insite (version 8.5.2 or later) or an equivalent diagnostic tool which supports the test described below.
Perform the Aftertreatment Diesel Particulate Filter Regeneration Analyzer Test (ensure that you have at least 250 MB space on your hard drive).
The test runs for 30 to 60 minutes approximately.
Once the test is completed, record the results and follow the instructions on the diagnostic tool.